LAMP stack is an acronim which stands for Linux Apache HTTP webserver, MySQL relational database and PHP dynamic programming language and is one of the most robust, stable and widely used Open Source collaboarative web software platform in Internet today due to is freely-available source code implementation, highly suitable for dynamic websites developing on all Linux platforms.
This tutorial will guide you on how you can install LAMP stack on Ubuntu 14.10 Server Edition, with the minimal requirements needed to configure and run a suitable web environment in order to develop complex dynamic websites based on PHP programming language which will interact with relational databases, such as MySQL.
STEP ONE – Install Apache HTTPD Webserver
1. Apache HTTPD one of the most popular web servers today and is available on almost all major modern Operating Systems, including Windows, Unix , BSD related platforms, MAC OSX and others. Build in a modular design approach, Apache can support a large variety of modules and features that can extend its core functionality and security (mod_ssl for example), making it highly suitable for Virtual Hosting or developing applications that are build on other server-side programming languages, such as Python, Perl, Bash CGI.
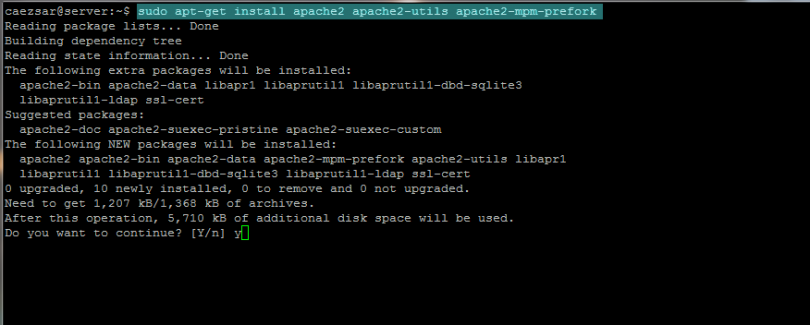
In order to install Apache webserver on Ubuntu Server from binary packages along with some modules that supply extra functionality for later use, such as Prefork MPM which uses one threat for multiple child processes, each process handling one connection at a time and Apache-Utils, which is very useful for generating encrypted passwords with htpasswd for basic server-side http authentication, issue the following command on your Terminal:
sudo apt-get install apache2 apache2-utils apache2-mpm-prefork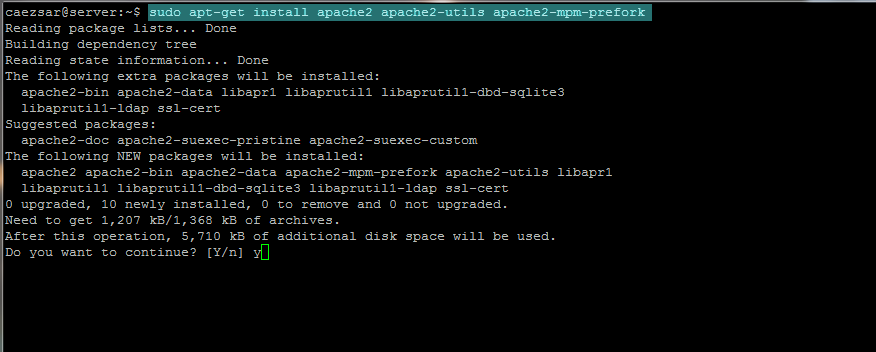
install apache httpd webserver
2. After Apache packages installation, if you get an error message when the server is started, saying that Apache could not determine the server's fully qualified domain name using 127.0.1.1, open the main Apache configuration file located on /etc/apache2/ system path with a text editor and at the bottom of the file add the following statement ServerName localhost as presented below:
sudo nano /etc/apache2/apache2.conf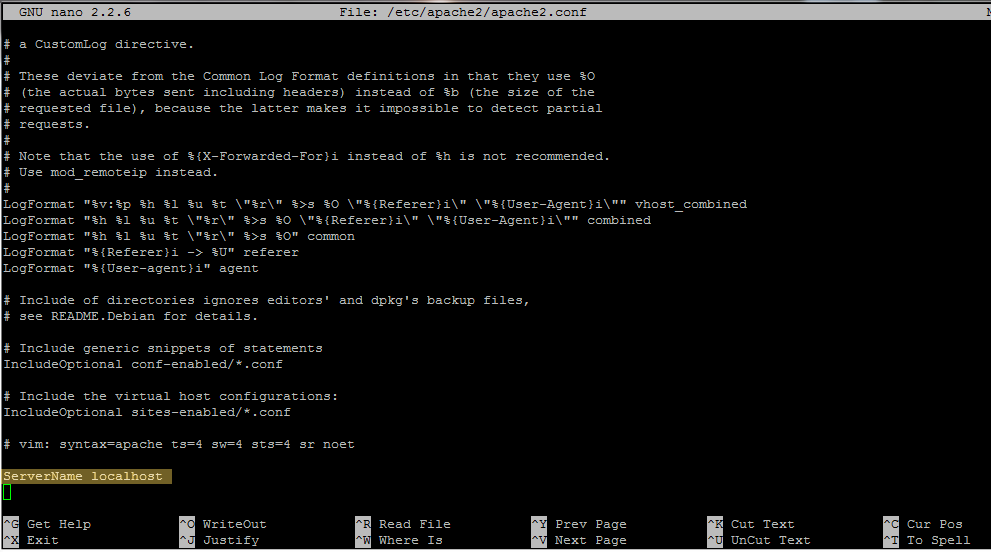
Apache ServerName globally directive
3. When you’re done editing Apache main file with the ServerName directive, restart Apache daemon to reflect changes and test the server by directing a browser from your LAN at your server’s IP Address using HTTP protocol: http://server_IP
sudo service apache2 restarthttp://192.168.1.11
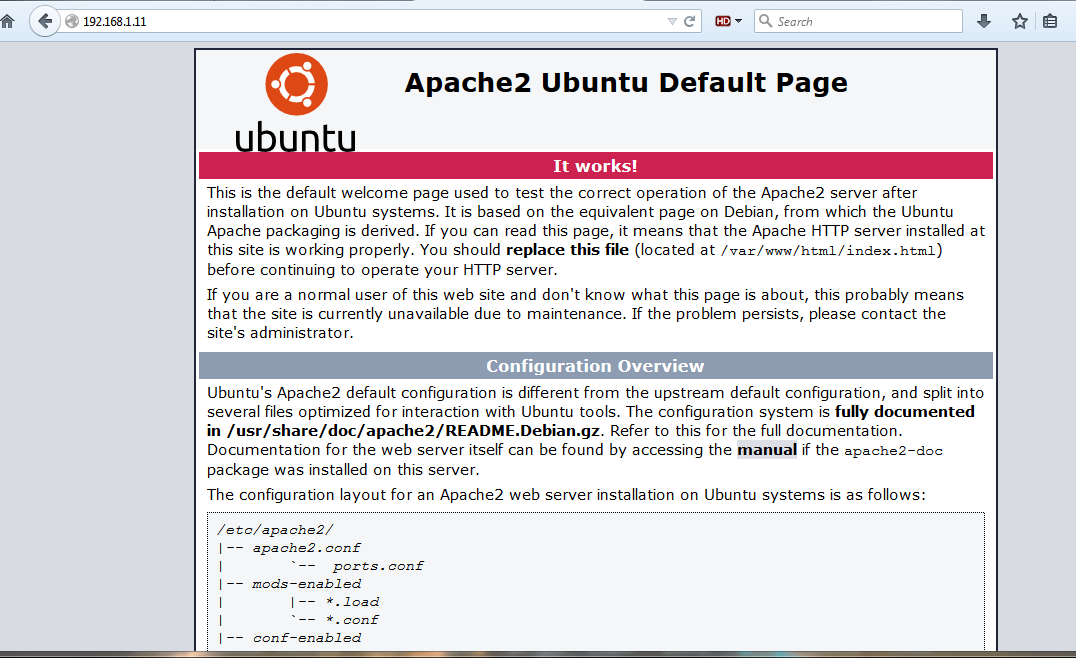
test apache server
STEP TWO – Install PHP Dynamic Programming Language
PHP (acronim form Hypertext Preprocessor) is an Open Source powerful general-purpose server-side scripting dynamic language and one of the most used programming languages with Apache webserver, implemented through an apache php module, which is best suited for web development because the PHP code can be easily embedded into the HTML mark-up code. Also, PHP interpreted code has some build-in functions which can connect and interact very easily with relational databases, the most popular database used in conjunction with PHP being MySQL.
4. In order to install PHP with some of its required Apache and MySQL modules from the binary packages repositories maintained by Ubuntu 14.10 developers issue the following command on your server’s Terminal console:
sudo apt-get install libapache2-mod-php5 php5 php5-mysql php5-cli php5-common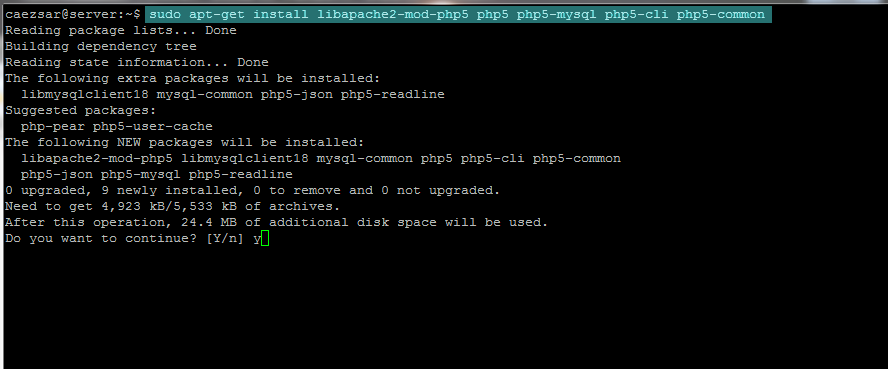
install php5
5. After PHP packages has been installed on your server, create an PHP info file at your webserver’s webroot directory located on /var/www/html/ system path in order to get PHP configuration environment variables. Fist create the info.php file with the below code by issuing the following command:
sudo nano /var/www/html/info.phpinfo.php file content:
<?php
phpinfo();
?>
6. After the info.php file has been created restart Apache service by issuing sudo service apache2 restart command, then navigate to your server’s IP Address at the following URL in order to test PHP environment:
http://192.168.1.11/info.php
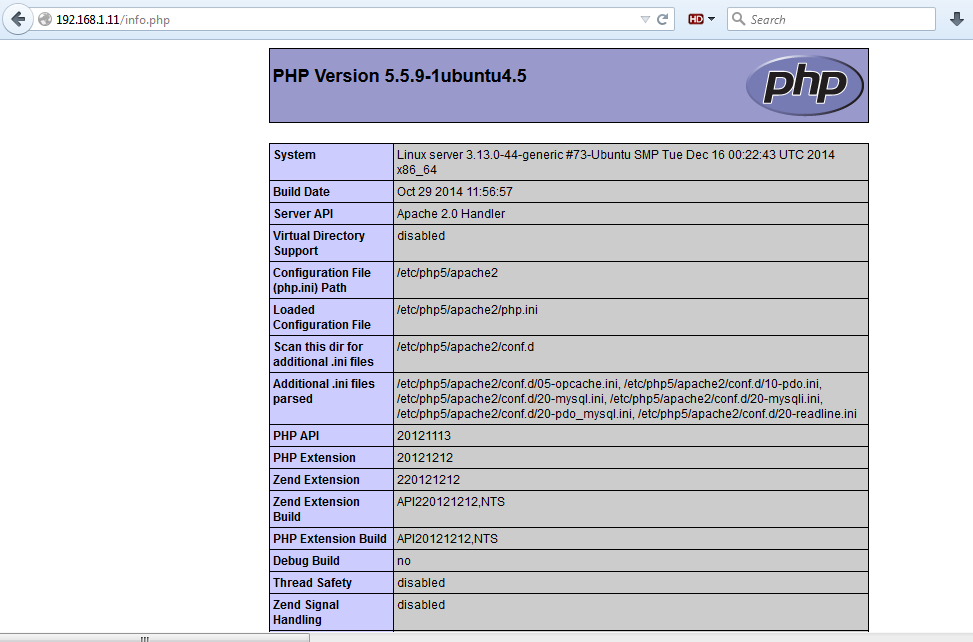
7. One more issue that you need to setup with PHP it’s to display the correct time on your PHP scripts in order to match your server’s physical time location. To apply this setting, open the main Apache PHP configuration file with an text editor, locate and uncomment the date.timezone statement (remove front semicolon) and add your nearest geographical location by consulting PHP Manual – Timezone.
sudo nano /etc/php5/apache2/php.iniSearch with CTRL+W, uncomment and make the following line look like this (replace values to match your geographical location)
date.timezone = Europe/Amsterdam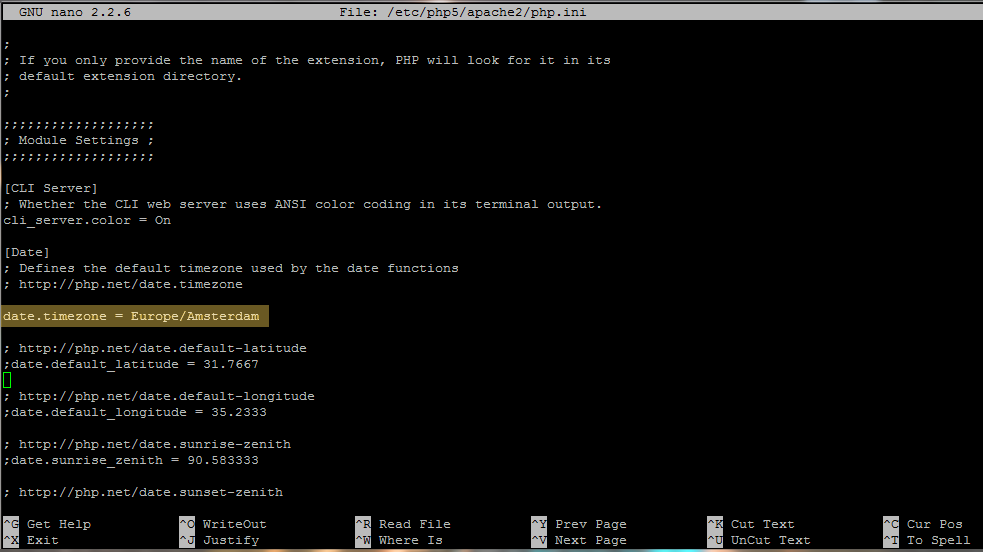
php timezone settings
8. After you’ve made the above changes, restart Apache daemon to apply the new PHP settings, then navigate to your PHP info URL as above and check PHP date function as illustrated in the below screenshot.
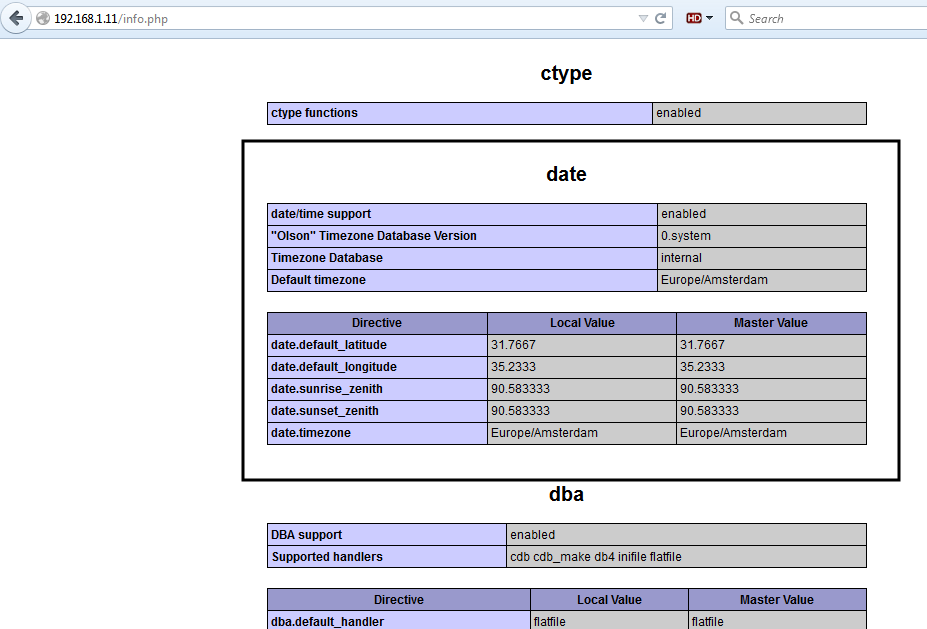
php info time function
STEP THREE – Install MySQL Relational Database
MySQL is a Open Source cross-platform, multiuser, multithreaded relational database, the central component of LAMP stack software and one of the most used databases in the world, which can be administered primary from Command Line, although there are a lot of GUI implementations which can provide graphical database manipulation, the most widely spreed being PhpMyAdmin.
9. To install MySQL database and client from binary packages on Ubuntu 14.10 issue the next command on a Terminal:
sudo apt-get install mysql-client mysql-server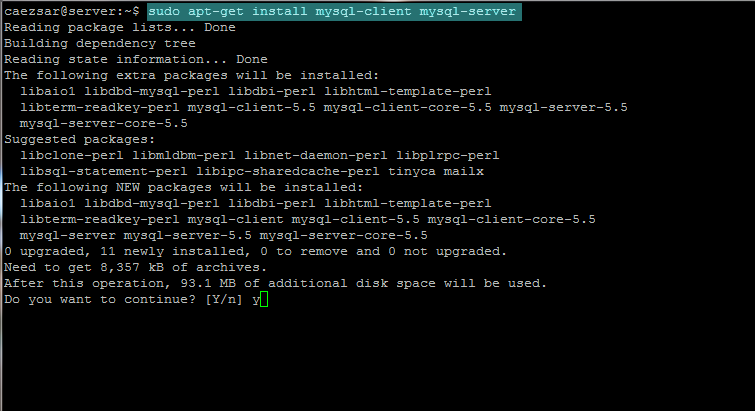
install mysql database
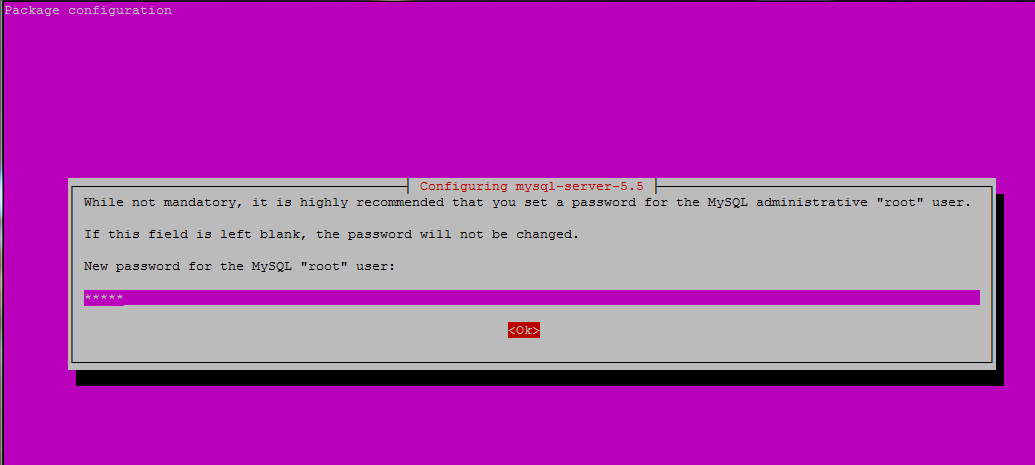
set mysql password
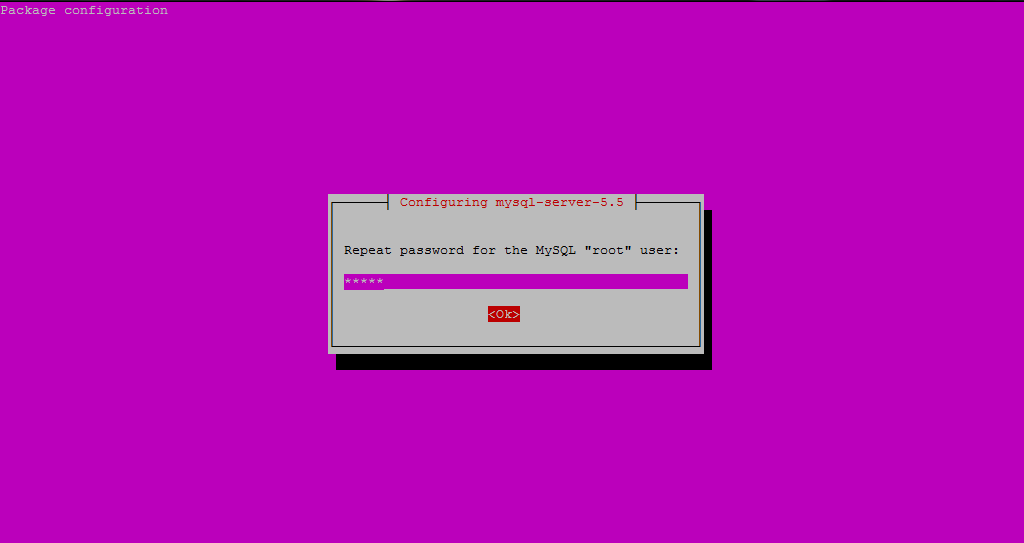
confirm mysql password
During the package installation you will be prompted by the installer to enter and confirm your database password, so choose a strong password in order to protect your database.
10. After the database is installed, the next step is to enforce security for MySQL by running the secure installation script in order to remove anonymous users, disable remotely root login and remove the test database. During this script run-out you can also change MySQL root password in case you haven’t configured a strong password for MySQL server.Use the following mysql_secure_installation command output in order to guide you further:
mysql_secure_installationNOTE: RUNNING ALL PARTS OF THIS SCRIPT IS RECOMMENDED FOR ALL MySQL
SERVERS IN PRODUCTION USE! PLEASE READ EACH STEP CAREFULLY!
In order to log into MySQL to secure it, we'll need the current
password for the root user. If you've just installed MySQL, and
you haven't set the root password yet, the password will be blank,
so you should just press enter here.
Enter current password for root (enter for none):
OK, successfully used password, moving on...
Setting the root password ensures that nobody can log into the MySQL
root user without the proper authorisation.
You already have a root password set, so you can safely answer 'n'.
Change the root password? [Y/n] n
... skipping.
By default, a MySQL installation has an anonymous user, allowing anyone
to log into MySQL without having to have a user account created for
them. This is intended only for testing, and to make the installation
go a bit smoother. You should remove them before moving into a
production environment.
Remove anonymous users? [Y/n] y
... Success!
Normally, root should only be allowed to connect from 'localhost'. This
ensures that someone cannot guess at the root password from the network.
Disallow root login remotely? [Y/n] y
... Success!
By default, MySQL comes with a database named 'test' that anyone can
access. This is also intended only for testing, and should be removed
before moving into a production environment.
Remove test database and access to it? [Y/n] y
- Dropping test database...
ERROR 1008 (HY000) at line 1: Can't drop database 'test'; database doesn't exist
... Failed! Not critical, keep moving...
- Removing privileges on test database...
... Success!
Reloading the privilege tables will ensure that all changes made so far
will take effect immediately.
Reload privilege tables now? [Y/n] y
... Success!
Cleaning up...
All done! If you've completed all of the above steps, your MySQL
installation should now be secure.
Thanks for using MySQL!
Also, be aware that MySQL root user differs from system root user, although both use the same name, in the sense that MySQL root user has full privileges to manipulate only MySQL databases and the system root user has administrative privileges over the entire system, less manipulating MySQL databases.
11. After you have secured MySQL server, log in onto database server with the root user and get the status of MySQL server, then log out by issuing the following series of commands:
mysql -u root -pmysql> status;
mysql> quit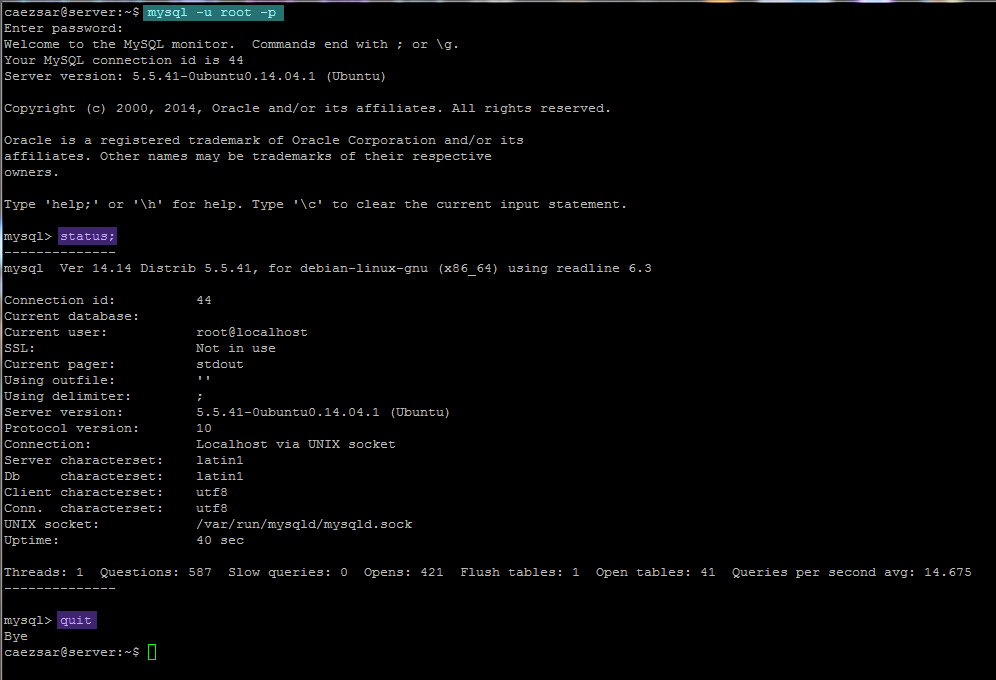
mysql status
STEP FOUR – Enable LAMP System-Wide
12. In order to automatically start LAMP stack after every system reboot on Ubuntu 14.10 you need to install sysv-rc-conf package by issuing the following commands on Terminal:
sudo apt-get install sysv-rc-conf
sudo sysv-rc-conf apache2 on
sudo sysv-rc-conf mysql on
That’s all! You have now successfully install LAMP stack software on Ubuntu 14.10 Server Edition and your system is ready for web based CMS applications software such as WordPress, Drupal, Joomla, phpBB, osCommerce, Magento, Prestashop, MediaWiki etc or other custom made web applications that runs on top of PHP and MySQL.
On the next series of LAMP tutorial we shall discuss more complex settings such as how to create and use Virtual Hosting with Apache, how to password protect a web based directory using Apache HTTP authentication, how to install and secure PhpMyAdmin, how to enforce Apache with HTTP SSL transactions, how to enable Apache CGI Gateway with Perl, Bash, Python and Ruby scripts and other security issues related to the entire LAMP stack.



Thank you so much! Great guide! 😀