PHPMyAdmin is an application used to manage databases as an interface, through phpMyAdmin will help you manage batabases more easily. By default, Ubuntu 22.04 repository comes with phpMyAdmin and the required dependencies. However, as often with Ubuntu LTS releases, the version and build are far behind what is currently available from the source, and you cannot install the upstream release candidate/beta releases.
So as you would have gathered by now, the tutorial will install the latest version as follows.
Download phpMyAdmin Latest Source Version
Downloading the latest version of phpMyAdmin is straightforward; visit the phpMyAdmin downloads page to find the newest version number.
Next, execute the following codes to automatically download all language’s latest versions.
At the time of the tutorial, 5.2.0 is the latest version, so this should be in the downloaded output; remember, in time, this version will change; however, the command will be the same!
To Download phpMyAdmin Latest Source Version, execute the following commands:
DATA="$(wget https://www.phpmyadmin.net/home_page/version.txt -q -O-)"
URL="$(echo $DATA | cut -d ' ' -f 3)"
VERSION="$(echo $DATA | cut -d ' ' -f 1)"
wget https://files.phpmyadmin.net/phpMyAdmin/${VERSION}/phpMyAdmin-${VERSION}-all-languages.tar.gz
Example output:

If you want to download the English version, substitute the end line with the following:
wget https://files.phpmyadmin.net/phpMyAdmin/${VERSION}/phpMyAdmin-${VERSION}-english.tar.gz
Then extract it.
tar xvf phpMyAdmin-${VERSION}-all-languages.tar.gz
Move phpMyadmin to /var/www/ directory.
sudo mv phpMyAdmin-*/ /var/www/phpmyadmin
Set phpMyAdmin File Permissions
Next, you must set the directory owner permissions to www-user for compatibility and security.
Set chown permission (important):
sudo chown -R www-data:www-data /var/www/phpmyadmin/
Set chmod permission (important):
sudo find /var/www/phpmyadmin/ -type d -exec chmod 755 {} \;
sudo find /var/www/phpmyadmin/ -type f -exec chmod 644 {} \;
Create a MariaDB Database and User for phpMyAdmin
Log in to MariaDB console.
sudo mysql -u root
Create a new database for phpMyAdmin using the following SQL command. This tutorial names it phpmyadmin, you can use whatever name you like for the database.
CREATE DATABASE phpmyadmin DEFAULT CHARACTER SET utf8mb4 COLLATE utf8mb4_unicode_ci;
The following SQL command will create the pmauser database user and set a password, and at the same time grant all permission of the new database to the new user so later on phpMyAdmin can write to the database. Replace red texts with your preferred password.
GRANT ALL ON phpmyadmin.* TO 'pmauser'@'localhost' IDENTIFIED BY 'your_preferred_password';
Flush the privileges table and exit the MariaDB console.
To finish off, flush the privileges for changes to take effect.
FLUSH PRIVILEGES;
Now exit with the following command.
EXIT;
Install Required and Recommended PHP Modules.
Run the following command to install PHP modules required or recommended by phpMyAdmin.
sudo apt install php-imagick php-phpseclib php-php-gettext php8.1-common php8.1-mysql php8.1-gd php8.1-imap php8.1-curl php8.1-zip php8.1-xml php8.1-mbstring php8.1-bz2 php8.1-intl php8.1-gmp
Create Nginx Server Block for phpMyAdmin
To be able to access the phpMyAdmin web interface, we need to create a Nginx server block by running the following command.
sudo nano /etc/nginx/conf.d/phpmyadmin.conf
We will configure it so that we can access phpMyAdmin via a sub-domain. Paste the following text into the file. Replace phpmyadmin.example.com with your actual sub-domain and don’t forget to create DNS A record for it.
server {
  listen 80;
  listen [::]:80;
  server_name phpmyadmin.example.com;
  root /var/www/phpmyadmin/;
  index index.php index.html index.htm index.nginx-debian.html;

  access_log /var/log/nginx/phpmyadmin_access.log;
  error_log /var/log/nginx/phpmyadmin_error.log;

  location / {
    try_files $uri $uri/ /index.php;
  }

  location ~ ^/(doc|sql|setup)/ {
    deny all;
  }

  location ~ \.php$ {
    fastcgi_pass unix:/run/php/php8.1-fpm.sock;
    fastcgi_param SCRIPT_FILENAME $document_root$fastcgi_script_name;
    include fastcgi_params;
    include snippets/fastcgi-php.conf;
  }

  location ~ /\.ht {
    deny all;
  }
}
Your phpMyAdmin files are in /var/www/phpmyadmin/ directory. Save (Ctrl+O) and close (Ctrl+X) the file. Then test Nginx configurations.
sudo nginx -t
If the test is successful, reload Nginx for the changes to take effect.
sudo systemctl reload nginx
Accessing the phpMyAdmin Web UI
To access the Web Interface, open your preferred Internet Browser and type in phpmyadmin.example.com with (example) your domain. You should come to the login screen of phpMyAdmin as follows:
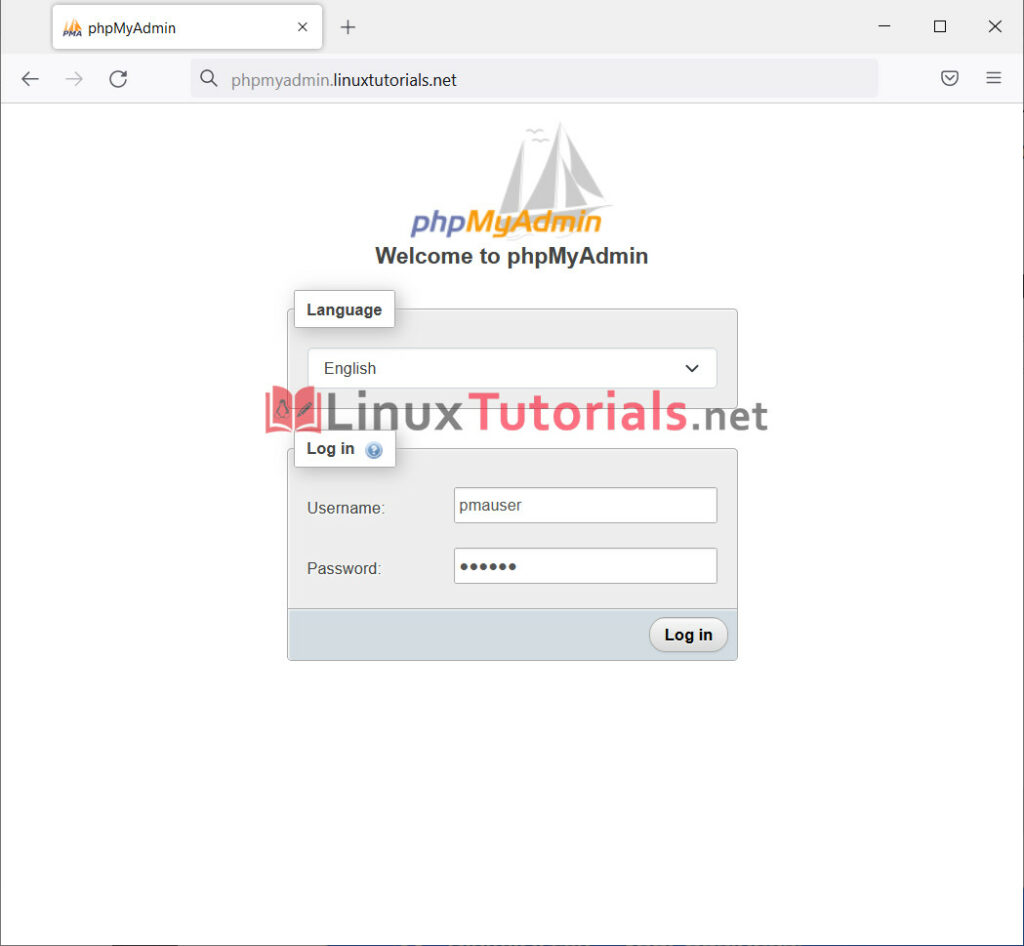
Enter your login details, then go forward into your phpMyAdmin dashboard.
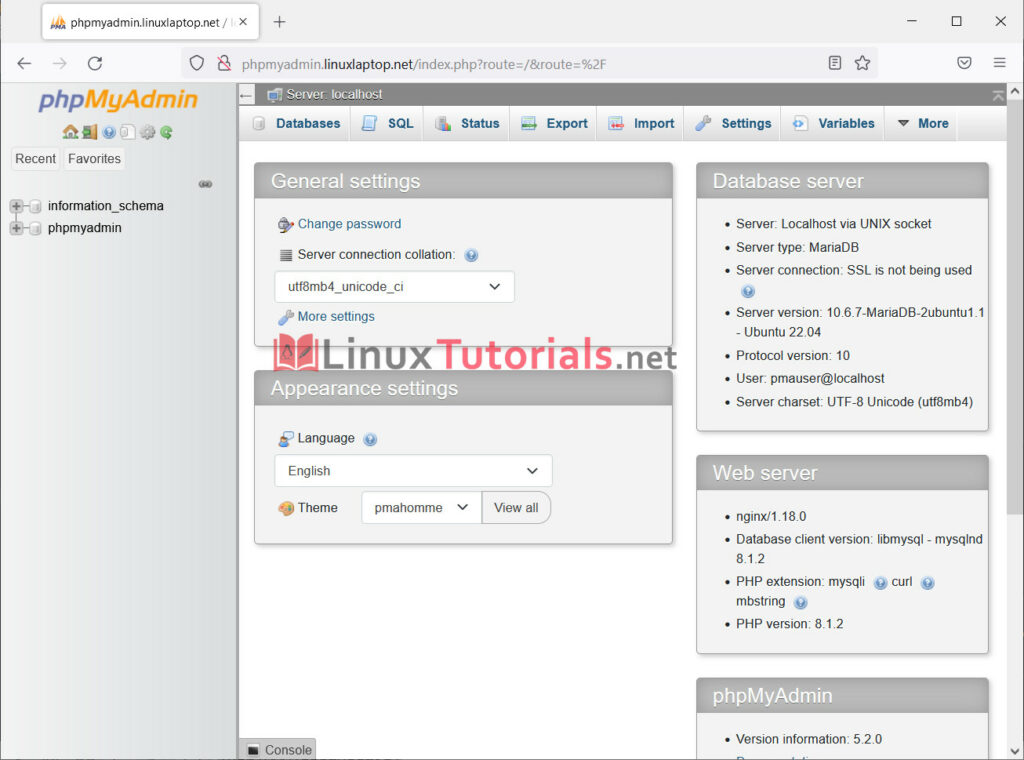
And that is it, and you have successfully installed the latest version of phpMyAdmin using LEMP. Alternatively, you can highly customize this installation. For instance, you can grab the latest beta or install different variations of LEMP with newer or older releases of Nginx, MariaDB, and PHP-FPM.
Secure phpMyAdmin with Let’s Encrypt SSL Free Certificate
To secure the phpMyadmin web interface, we can install a free Let’s Encrypt TLS certificate. Install the Let’s Encrypt client from Ubuntu 22.04 software repository like below:
sudo apt install certbot python3-certbot-nginx
Python3-certbot-nginx is the Nginx plugin for Certbot. Now run the following command to obtain and install TLS certificate.
sudo certbot --nginx --agree-tos --redirect --hsts --staple-ocsp --email [email protected] -d phpmyadmin.example.com
Where:
- –nginx: Use the Nginx authenticator and installer
- –agree-tos: Agree to Let’s Encrypt terms of service
- –redirect: Enforce HTTPS by 301 redirect.
- –hsts: Add the Strict-Transport-Security header to every HTTP response.
- –staple-ocsp: Enables OCSP Stapling.
- –must-staple: Adds the OCSP Must Staple extension to the certificate.
- -d flag is followed by a list of domain names, separated by a comma. You can add up to 100 domain names.
- –email: Email used for registration and recovery contact.
During the certificate installation, you will get a notice to receive emails from EFF(Electronic Frontier Foundation). Choose either Y or N then your TLS certificate will be automatically installed and configured for you.
Now, your URL will be HTTPS://phpmyadmin.example.com instead of HTTP://phpmyadmin.example.com.
If you use the old HTTP URL, it will automatically redirect to HTTPS.
Optionally, you can set a cron job to renew the certificates automatically. Certbot offers a script that does this automatically, and you can first test to make sure everything is working by performing a dry run.
TLS Certificate Auto-Renewal
To automatically renew Let’s Encrypt certificate, simply edit root user’s crontab file.
sudo crontab -e
Then add the following line at the bottom.
@daily certbot renew --quiet && systemctl reload nginx
Reloading Nginx is needed for it to pick up the new certificate to clients.

