Apache is one of the most widely spread Open Source web server for web hosting in Internet due to its stability, robustness and rich variety of modules and features. Due to its popularity, Apache comes with pre-build binary packages for almost all major Linux distributions and can also be installed on other Operating Systems such as Unix, Windows, Mac OSX, BSD etc.
However, a basic installation of Apache on Linux systems, by default, doesn’t offer a full protection against attackers, so a few security measures must be taken in order to protect your machines, web servers and web documents against such types of malicious attacks.
This article will provide you a few tips on how you can secure and protect Apache Web Server installed on Debian-based Linux distributions.
PREREQUIRES
Before starting to enumerate and use the security tips, first we need to run a few commands in order to get an inside on how Apache software is compiled and works on the system, what version of the server with what modules are installed and what modules and Virtual Hosts are actively.
– View Apache Version
In order to get Apache short version run the following command:
apachectl -vFor an exhaustive view of Apache build-in options run the following command:
apachectl -V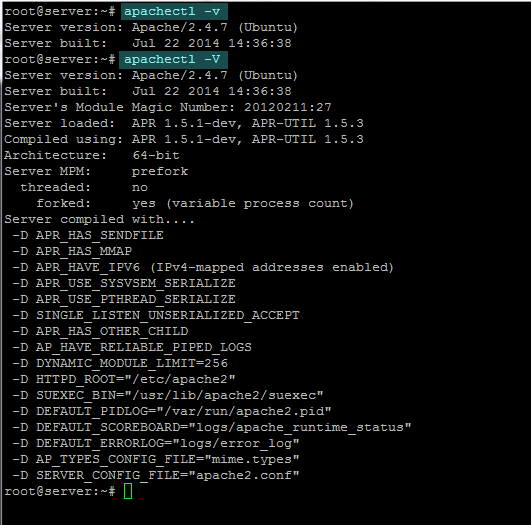
apache version
– View Apache Configuration
To see Apache webroot path, enabled Virtual Hosts, PidFile and other useful information run the below command:
apachectl -S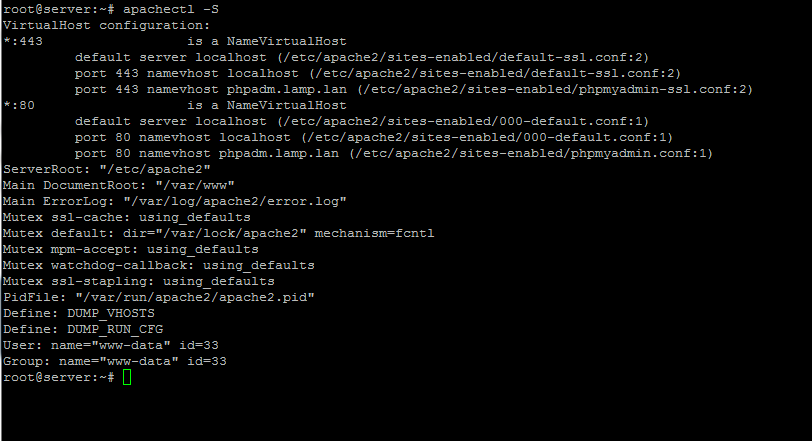
apache configuration
– View Apache Active Modules
To view all the Apache loaded modules at runtime issue the following command:
apachectl -M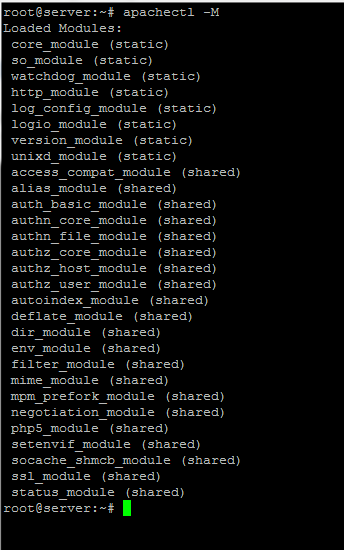
loaded apache modules
To disable an Apache activated module issue the following command:
sudo a2dismod [TAB] module_nameAPACHE SECURITY TIPS
Armed with all this knowledge about how Apache is build and runs on your system, it’s time to proceed with software enforcement by covering the following tips best suited for your environment.
1. Disable Apache Version and Server Signature
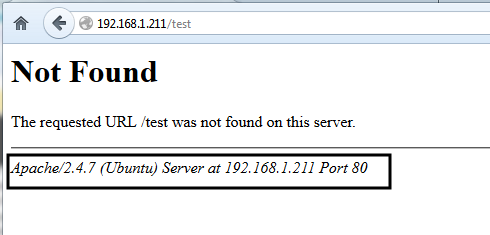
By default, whenever a HTTP request comes to Apache by whatever methods, the web server automatically displays its installed Version and the Operating System name as illustrated in the below screenshot, making it more easily for attackers to exploit server and system vulnerabilities known for that specifically version number.
view apache version
In order to hide this type of information for outside request, open Apache security.conf file and change the ServerSignature statement from On to Off and, also, change the ServerTokens statement to Prod. Use the below screenshot as a guide.
sudo nano /etc/apache2/conf-enabled/security.confsecurity.conf modified statements:
ServerTokens Prod
ServerSignature Off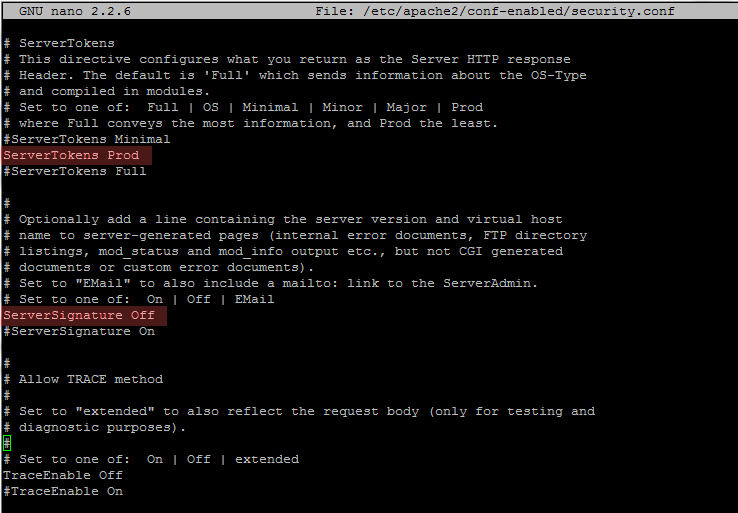
hide apache version
After you have made all the above changes, restart Apache daemon to reflect changes and use a browser to test the configuration by directing it to a URL non-existent path at your server’s IP Address or domain, such as http://server-ip/test (where the test resource doesn’t exist on webroot path)
sudo service apache2 restart
test apache version
In order to test the ServerSignature changes from command line use a utility such as wget, telnet or curl as in the below examples:
– With Telnet
telnet localhost 80
HEAD / /HTTP1.1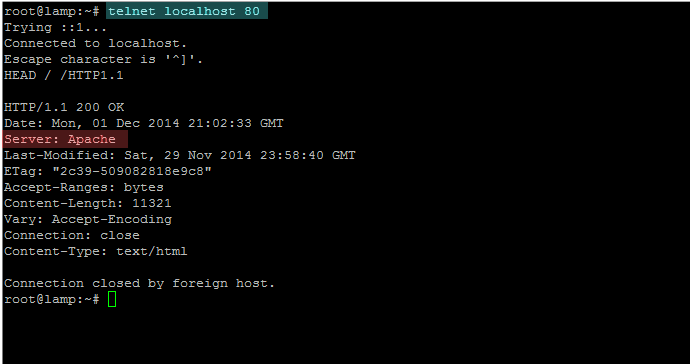
test apache version with telnet
– With Curl
curl -I -L http://localhost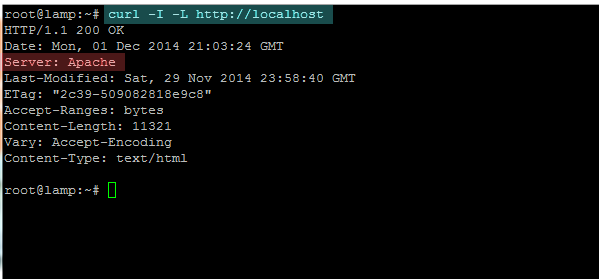
test apache version with curl
– With Wget
wget --server-response --spider http://localhost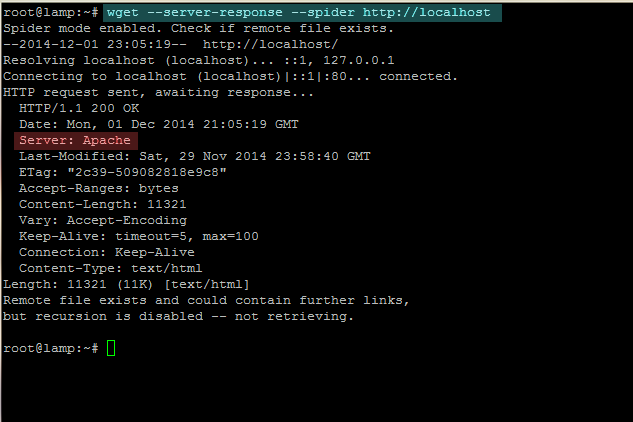
test apache version with wget
2. Disable Directory Listing (Autoindex)
Autoindex is an Apache module which automatically generates and outputs a web directory listing, similar to ls command, when no index files are provided.

apache autoindex
To disable Apache autoindex module on Debian based distributions issue the following commands on your server console.
sudo a2dismod autoindex
sudo service apache2 restart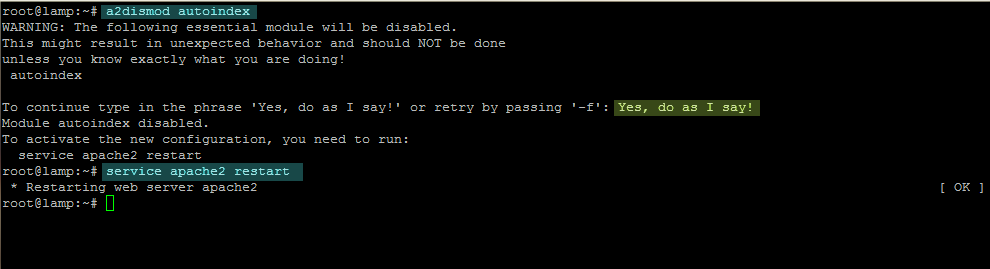
disable apache autoindex
To test the changes refresh the webpage and a Not Found message error should be displayed on your browser as in the below screenshot.
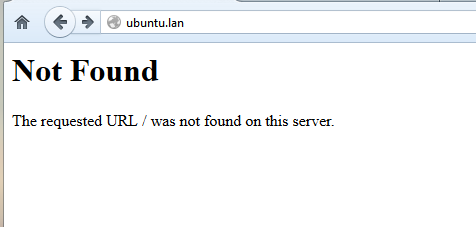
apache autoindex disabled
3. Disable CGI Scripts Execution, Server-Side Includes and Follow Symbolic Links
SSI represents a way for Apache to generate dynamic content based on HTML files without the need to run CGI programs. On the other hand, CGI programs provides a way for Apache to generate dynamic webpage content based on external programs or scripts written in different programming languages such as Bash, Python, Perl, C, C++ etc.
In order to turn off CGI scripts, Follow Symlink and Server-Side Includes for a specific directory add the following Options directives as presented below:
Options -Includes -ExecCGI -FollowSymLinks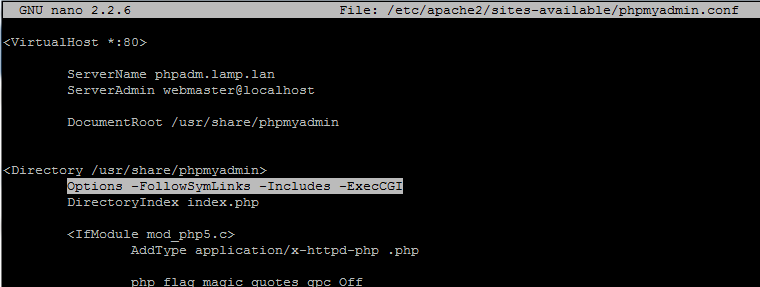
disable apache ssi and cgi
4. Create an .htaccess File and Change Directory Index
This can be more evaluated as a trick than a security tip. First create and .htaccess file on your webroot and add the below directive in order to change Apache default index file to a arbitrary index file (here I have used script.cgi file as an index file for ubuntu.lan Virtual Host which will be automatically served).
sudo nano /var/www/html/ubuntu.lan/.htaccess.htaccess excerpt:
DirectoryIndex script.cgi
Change .htaccess permissions to match Apache user:
sudo chown www-data:www-data /var/www/html/ubuntu.lan/.htaccessAfter you have created the .htaccess file on your Virtual Host DocumentRoot, open the Virtual Host configuration file for editing, add the below statements and restart Apache server to apply changes. The Require all granted instruction is only necessary when the Directory path is changed to a different location than /var/www/.
<Directory "/var/www/html/ubuntu.lan">
     AllowOverride All
     Require all granted
     Order allow,deny
     Allow from all
</Directory>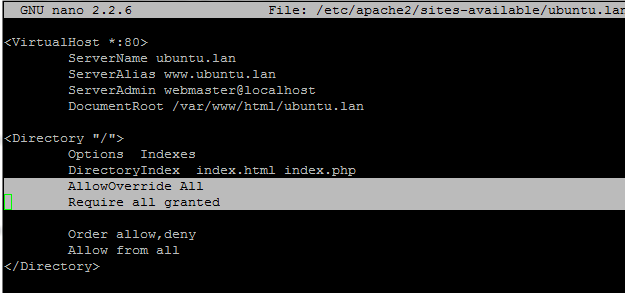
allow .htaccess directives
To disable .htaccess file just change the AllowOverride directive from All to None.
5. Enable Apache SSL and Create Apache SSL Certificates
For Apache Self-Signed Certificates please follow the instructions from this article: Create Self-Signed Certificates and Enable Apache SSL in Ubuntu
6. Enable Rewrite Module and Redirect HTTP to HTTPS
To redirect HTTP non-secure requests to HTTPS for a specific domain name, enable the rewrite module and add the following statements on non-SSL Virtual Host configuration file. For on-fly activation (without server restart) you can add the statements to .htaccess file at your domain webroot with the condition that the .htaacess file must be activated.
RewriteEngine On
RewriteCond %{HTTPS} on
RewriteRule (.*) http://%{HTTP_HOST}%{REQUEST_URI}
or replace the above RewriteRule with the one below:
RewriteRule ^/?(.*) https://%{SERVER_NAME}/$1 [R,L]
Enable rewrite module and restart Apache to apply changes in case you are not using an activated .htaccess file:
sudo a2enmod rewrite
sudo service apache2 restart
7. Use Apache Access Control List to Restrict or Allow Access
Access Control are a set of rules which can limit access to a specific Apache resource. In order to completely block access to an Apache Vhost webroot add the following statements on your Virtual Host configuration file:
<Directory "/">
    Options None
    Order allow,deny
    Deny from all
</Directory>
To allow just visitors from a specific IP Address or Network or domain use the following syntax:
Order Deny, Allow
Deny from all
Allow from 192.168.1.0/16 host.domain.tld 10.252.46.165
This set of rules can also be applied on-fly to an .htaccess file.
8. Protect Web Documents Using Linux File Permissions
Another simple but effective security measure that you can take into consideration is to protect web documents by changing file permissions. Suppose you want to protect a HTML page hosted on Apache DocumentRoot issue the following command against that file:
sudo chmod 600 /var/www/html/document.htmlMore drastically, if Apache user and group www-data are the owners of that file you can use the following command to completely deny access:
sudo chmod 000 /var/www/html/document.htmlTo revert changes issue the following command:
sudo chmod 644 /var/www/html/document.htmlTo deny access to an entire directory along with its content run the following command:
sudo chmod -R 000 /var/www/html/dir_to_deny_accessRevert changes to directory:
sudo chmod -R 755 /var/www/html/dir_to_deny_accessTo protect a web document from being changed use the chattr Linux command and change the attribute file to immutable:
sudo chattr +i /var/www/html/document.htmlTo view the files with immutable attributes and revert changes issue the following commands:
sudo lsattr /var/www/html/
sudo chattr -i /var/www/html/document.html
9. Create Custom Apache Log Files
For instructions concerning Apache log files please review Apache Virtual Hosts Article
10. Change Apache User Shell
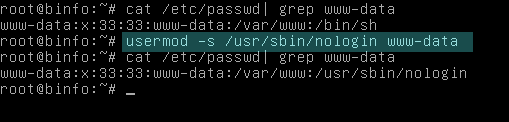
On most Debian based Linux distributions, Apache runs under www-data user. By defult, the www-data user has a valid Linux shell which points to /bin/sh. In order to block Apache user from attempting to log in into the system, change the system shell to point to nologin by issuing the following command:
sudo usermod -s /usr/sbin/nologin www-data
change apache user shell
This are just a couple of security and hardening tips that you should take intro consideration whenever you are using Apache in a production environment.