Packet Tracer 8.2 is a standalone simulation and visualization program. You can install Packet Tracer via the Command Line Interface (CLI), using user credentials that have elevated privileges.
Follow these instructions to download and install Packet Tracer on Ubuntu Desktop 24.04 LTS.
Step 1: Download the Packet Tracer installation file and choose a location to save the installation file
Netacad:
Packet Tracer 8.2.2 Ubuntu 64bit
Google Drive:
Packet Tracer 8.2.2 Ubuntu 64bit
Open a terminal and navigate to the location where you saved the Packet Tracer installation file.
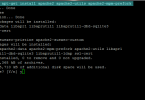
b. Enter the following command to install Packet Tracer and provide the user password when prompted.
User@Ubuntu:~/Downloads$ sudo apt-get install ./CiscoPacketTracer_xxx_Ubuntu_64bit.debwhere xxx is Packet Tracer version.
c. The Setup dialog opens to the License Agreement. Read through the agreement. Use the tab key to
highlight and press Enter to continue.
Note: The mouse does not work while installing Packed Tracer using CLI.
d. Use the tab key to select and press Enter to accept the License Agreement.
Now you should be able to open Packet Tracer via the Application menu or the command packettracer in the
terminal.


