SSL (Secure Sockets Layer) represents a cryptographic protocol used in web HTTP transactions between two parts , usually a server and a client, (in this case between Apache HTTPD web server and a browser) in which the information exchanged between them is securely transmitted over the network. Once the connection is negotiated and established at both ends, only the two parts involved in the communication have access to the transmitted information, making it very hard (almost impossible without the private key) for third-parties who intercepts the transmission to decrypt the message.
Apache web server natively comes pre-installed with the mod_ssl module if the installation is done through apt-get package manager command line (binary pre-compliled installation) and supports SSL encrypted transactions by default in Ubuntu 14.10 once the ssl module is activated. When the SSL module is activated, Apache parses the configurations found in /etc/apache2/mods-enabled/ssl.conf and /etc/apache2/sites-enabled/default-ssl.conf with the default installed SSL Certificate and displays default webpage when the browser requests for HTTPS transactions.
The default port used by Apache for HTTPS transactions is port 443
This procedure will guide you on how you can create and enable Apache Virtual Hosts with SSL transactions for a domain and how you can generate and install Self-Signed Certificates key pairs for Virtual Hosts (certificates that are not issued by Commercial Certificate Authorities) in order to securely transmit sensitive data in your network or over Internet.
Also, a note that you should take into considerations when using Self Signed Certificates is that this types of certificates usually generates warnings on clients browsers, so the client must manually accept the certificate.
Note: Every time you are using Apache Virtual Hosting make sure that your DNS resolution or local resolution (hosts file) is accurate and correctly maps your server’s IP Address to domain names in order to be completely understood and processed by Apache VirtualHost and ServerName directives.
REQUIREMENTS
STEP ONE – Create SSL Virtual Host Configuration File
The first method presented below will discuss how you can create an Apache Virtual Host with SSL transactions for your website (or domain) by placing the Vhost statements on the same configuration file used for your already non-SSL domain.
1. Assuming that your domain is called ubuntu.lan and it already has a non-SSL virtual host configuration file created (follow the previous article Enable Apache Virtual Hosting on Ubuntu 14.10), let’s start adding the instructions in order to create the its SSL equivalent. So, first open the enabled virtual host configuration file for editing by issuing the following command: (always edit the configuration files from site-available path because the ones from sites-enabled location are just symlinks to sites-available.)
sudo nano /etc/apache2/sites-available/ubuntu.lan.conf2. Next, once the file is open for editing, navigate at the bottom of the file and add the following instructions after the last VirtualHost directive (see the below screenshot for eventual unclarities):
<IfModule mod_ssl.c>
        <VirtualHost *:443>
                ServerAdmin webmaster@localhost
                ServerName www.ubuntu.lan
                ServerAlias ubuntu.lan
                DocumentRoot /var/www/html/ubuntu.lan

                ErrorLog ${APACHE_LOG_DIR}/ubuntu.lan.ssl-error.log
                CustomLog ${APACHE_LOG_DIR}/ubuntu.lan.ssl-access.log combined

                SSLEngine on

                SSLCertificateFile      /etc/apache2/ssl/ubuntu.lan.crt
                SSLCertificateKeyFile   /etc/apache2/ssl/ubuntu.lan.key

                  <FilesMatch ".(cgi|shtml|phtml|php)$">
                                SSLOptions +StdEnvVars
                  </FilesMatch>

                  <Directory /usr/lib/cgi-bin>
                                SSLOptions +StdEnvVars
                  </Directory>

                BrowserMatch "MSIE [2-6]"
                                nokeepalive ssl-unclean-shutdown
                                downgrade-1.0 force-response-1.0
                BrowserMatch "MSIE [17-9]" ssl-unclean-shutdown

        </VirtualHost>
</IfModule>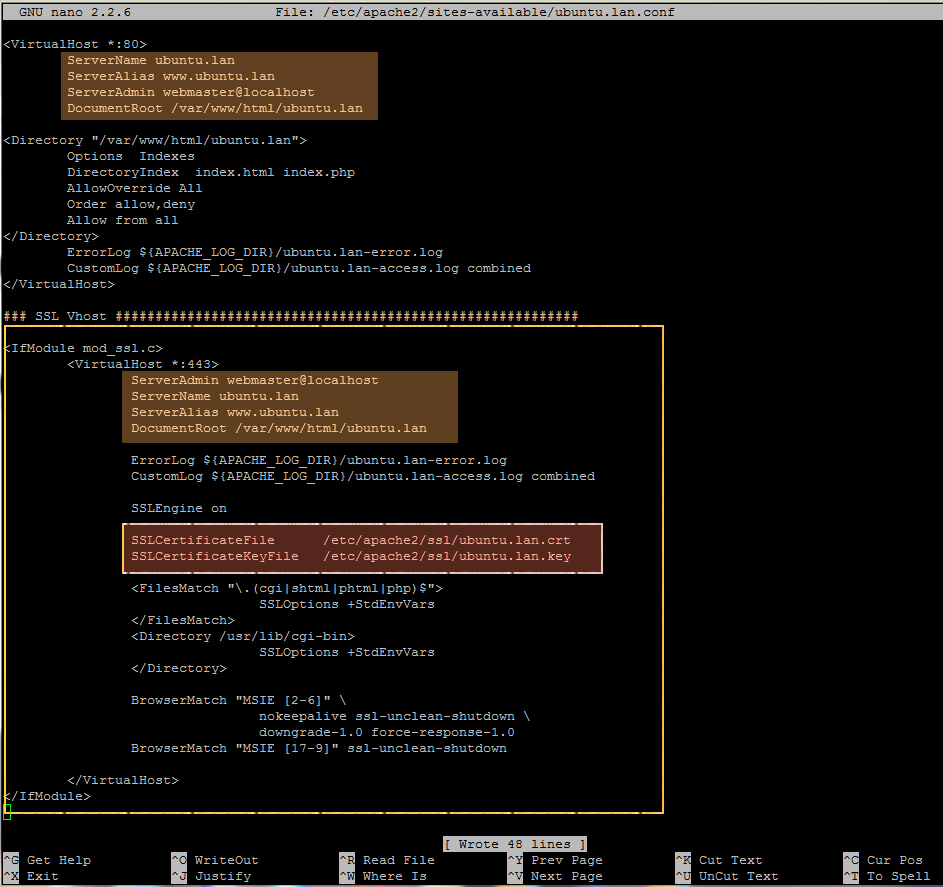
apache ssl vhost instructions
While editing SSL instructions assure that ServerName, ServerAlias and DocumentRoot statements will match the same values as the ones used for your non-SSL domain (replace this values with your own), otherwise it will serve web files from a different location or will handle a different DNS domain. Also pay further attention on the others directives and statements as well such as Certificate pairs locations, Directories or Log files.
STEP TWO – Generate and Install Virtual Host Self-Signed Certificate
3. After finishing editing the file, save it and proceed further with generating and installing the custom Self-Signed Certificate pairs, as this SSL Virtual Host suggests. In order to generate the Signed Certificate .crt and the Private Key .key with the name of your domain, create the following Bash script to a system executable path (preferably in /usr/local/bin/ location) and add the following content:
sudo nano /usr/local/bin/a2sslcerta2sslcert bash script excerpt:
#!/bin/bash

mkdir /usr/local/ssl/ > /dev/null 2>&1
ln -s /etc/ssl/openssl.cnf /usr/local/ssl/ > /dev/null 2>&1

        if [ $# != 1 ];
        then
echo -e "Use the script with one paratemter!nEx: $0 ubuntu.lan"
        else

cert="$1"
mkdir /etc/apache2/ssl > /dev/null 2>&1
cd /etc/apache2/ssl

openssl req -x509 -nodes -days 365 -newkey rsa:2048 -keyout $cert.key -out $cert.crt

chmod 600 $cert.key

echo -e "The Certificate and Key for $cert has been generated!"
echo -e "nPlease link it to Apache SSL $cert available website!"
ls -all /etc/apache2/ssl
exit 0
        fi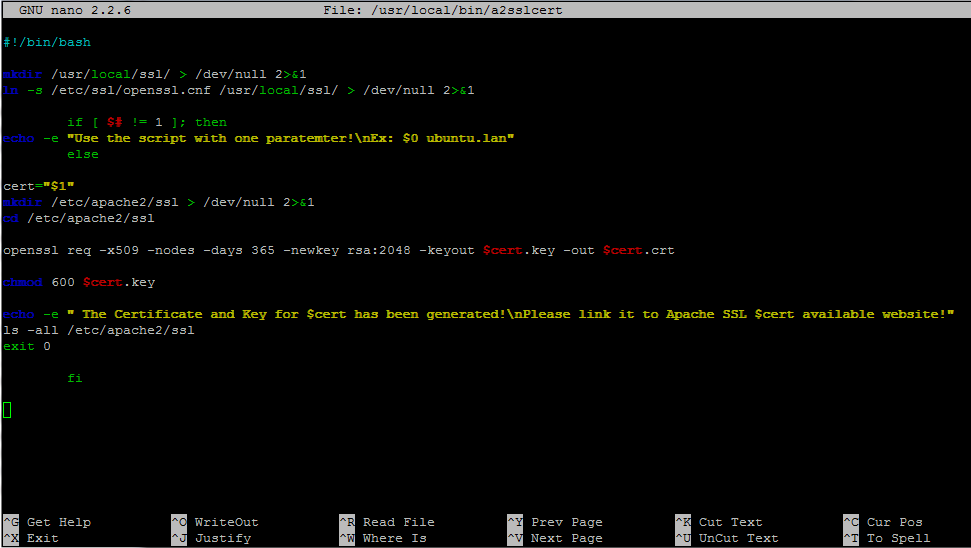
bash script ssl certificate
4. After you have created the above a2sslcert bash script, assure that it has executable permissions and run the script with your domain name as a parameter in order to generate and automatically install the Self-Signed Certificate pairs for your virtual host.
sudo chmod +x /usr/local/bin/a2sslcert
sudo a2sslcert ubuntu.lan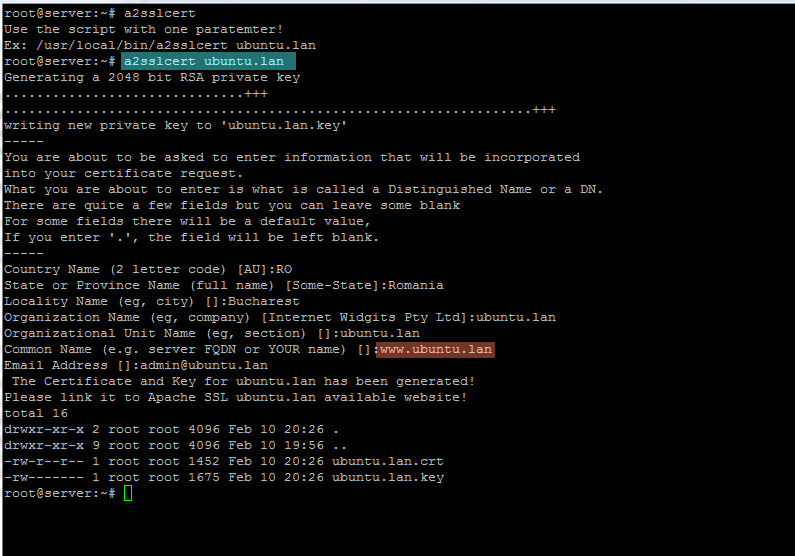
generate ssl certificate
Fill the certificate with the required values for your virtual host and make sure that the Common Name of the certificate matches your vhost Fully Qualified Domain Name – FQDN – (in this case the FQDN is www.ubuntu.lan).
STEP THREE – Activate Apache SSL Module and Access SSL Domain
5. The last step needed in order to access Apache SSL Virtual Host is to enable the SSL module and restart the server to reflect changes, by issuing the following commands:
sudo a2enmod ssl
sudo service apache2 restart
enable ssl module
6. To visit your domain webpage using the HTTPS protocol, open a browser at the following URL https://your_domain.tld, confirm the new Certificate to overcome the browser pop-up warnings and you will be presented with the SSL webpage version of your domain as illustrated in the below screenshots.
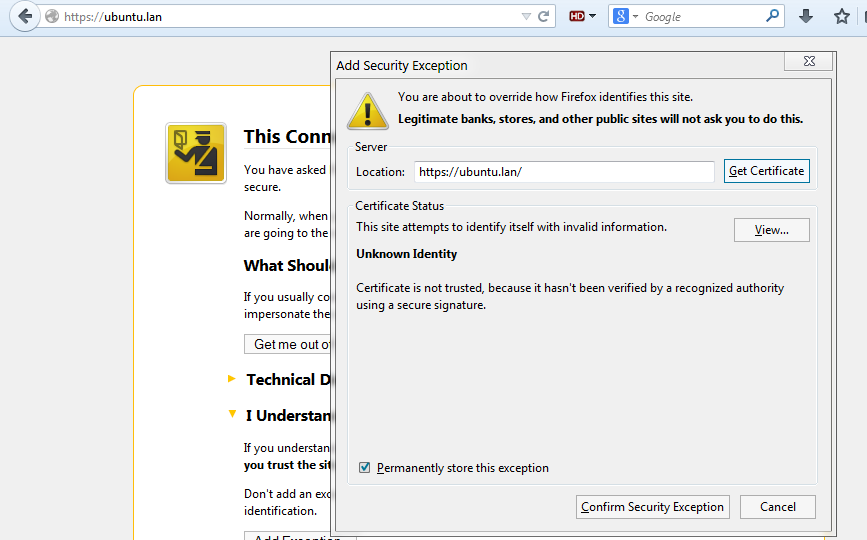
browser certificate warning
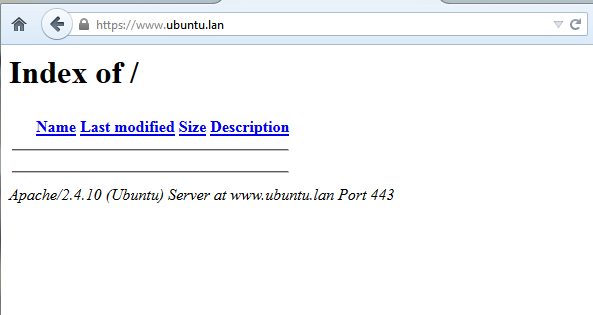
ssl domain page
Also, note that if you are hosting multiple non-SSL websites (domain or subdomains) on your server, make sure that you create a SSL version for every one of them (you can later use Apache redirection to redirect SSL Vhosts to non-SSL Vhosts), otherwise this SSL version will be automatically served for all non-SSL Virtual Hosts when the SSL transactions occur.
Create SSL Virtual Hosts – Alternate Method
Separate non-SSL Virtual Hosts from SSL Virtual Hosts
This alternate method will describe how you can create a SSL Virtual Host for a second domain (website) with the SSL Vhost instructions placed on a separate configuration file than the one used for the non-SSL Vhost.
1. Assuming that this new domain will be called mysite.lan, let’s create the separate Apache configuration file that will hold the configurations for the domain (the non-SSL configuration file can be mysite.lan.conf):
sudo nano /etc/apache2/sites-available/mysite.lan-ssl.confmysite.lan-ssl.conf file excerpt:
<IfModule mod_ssl.c>
        <VirtualHost *:443>
                ServerAdmin webmaster@localhost
                ServerName www.mysite.lan
                ServerAlias mysite.lan
                DocumentRoot /srv/www/mysite.lan

<Directory "/">
        Options  +Indexes
        DirectoryIndex  index.html index.php
        AllowOverride All
        Order allow,deny
        Allow from all
        Require all granted
</Directory>
                ErrorLog ${APACHE_LOG_DIR}/mysite.lan.ssl-error.log
                CustomLog ${APACHE_LOG_DIR}/mysite.lan.ssl-access.log combined

                SSLEngine on

                SSLCertificateFile      /etc/apache2/ssl/mysite.lan.crt
                SSLCertificateKeyFile   /etc/apache2/ssl/mysite.lan.key

                <FilesMatch ".(cgi|shtml|phtml|php)$">
                                SSLOptions +StdEnvVars
                </FilesMatch>
                <Directory /usr/lib/cgi-bin>
                                SSLOptions +StdEnvVars
                </Directory>

                BrowserMatch "MSIE [2-6]"
                                nokeepalive ssl-unclean-shutdown
                                downgrade-1.0 force-response-1.0
                BrowserMatch "MSIE [17-9]" ssl-unclean-shutdown

        </VirtualHost>
</IfModule>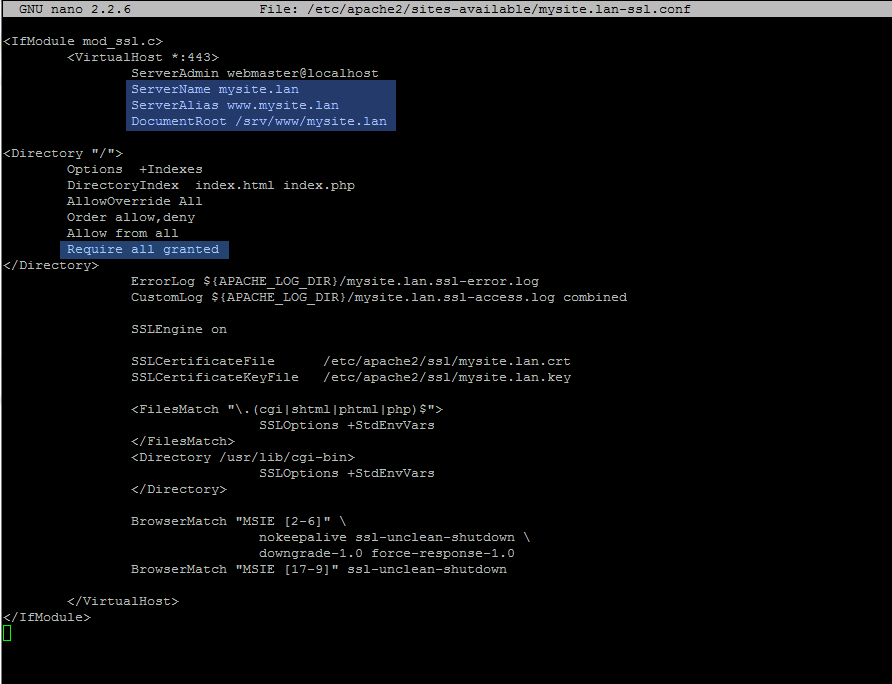
alternate ssl conf file
Use the same configurations as explained on the first method and replace mainly ServerName, ServerAlias and DocumentRoot values accordingly.
2. Using the same a2sslcert bash script as above, generate and install the Certificate pairs for this SSL domain by issuing the following command:
sudo a2sslcert mysite.lan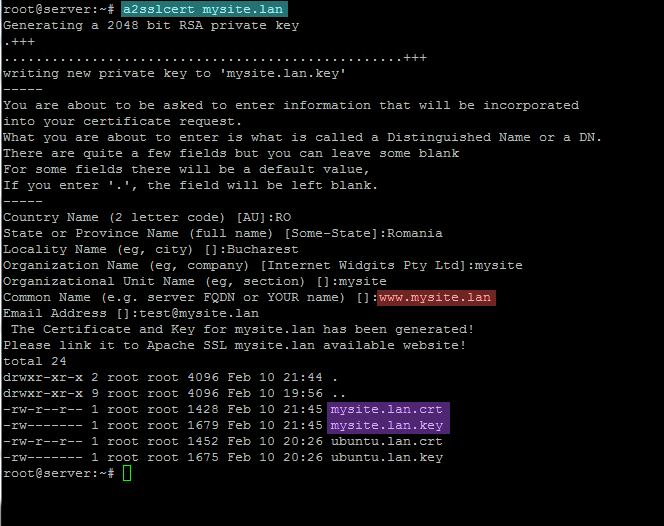
ssl certificate
3. After the Virtual Host and Certificates pairs are in place, create the DocumentRoot new path, activate the SSL website version of the DNS domain and restart Apache daemon in order to apply changes and access the new domain by issuing the following commands:
mkdir -p /srv/www/mysite.lan
sudo chgrp -R www-data /srv/www/mysite.lan
sudo a2ensite mysite.lan-ssl.conf
sudo service apache2 restart
If you want to automatically redirect your non-SSL website to the SSL version use the instructions found on point 6 from this article: Apache Web Server Security Tips for Debian-based Systems
4. To visit the default webpage of your new domain open a browser and enter the name of your new domain using the HTTPS protocol.
https://your_new_domain.tld
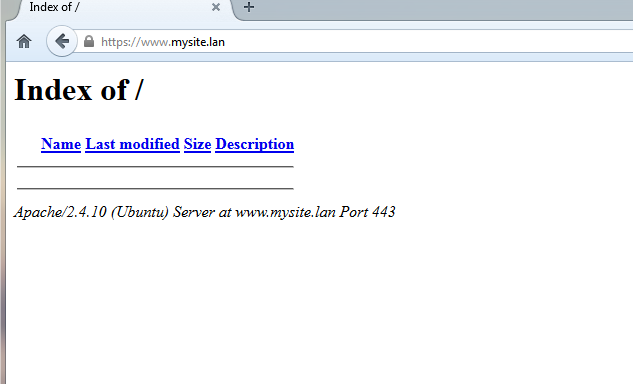
second ssl domain
That’s all! Using one or both methods described on this tutorial you can now easily create create multiple SSL websites for every domain you host on your server. Both methods have pros and cons so I will not suggest to use one over the other because everything depends on how you setup Apache to handle Virtual Hosts for multiple domains.